
Maintenance Tips
Do it Yourself Tips
The experts at St Paul Handyman share top maintenance tips for the projects they are frequently called on to handle. Go ahead and do it yourself and save money
Re gluing Plastic Laminate.
First, Try reviving the old adhesive by placing a cloth over the area and heating it with a cool iron, then press the loose piece down with a roller. Alternatively, lift the loose edge gently and scrape out dried glue with a utility knife. Blow out any loose debris with a straw. Using a toothpick, spread carpenter's glue sparingly on the exposed countertop core. Press the laminate back into place and wipe off excess glue.
Second, Lay a piece of wax paper over the repair, then cover it with a scrap piece of wood. With another scrap protecting the underside of the countertop, clamp the repair tightly. Wait 24 hours for the glue to set, the release the clamp.
Quick fix for countertop scratches
Squeeze a small quantity of plastic seam filler onto a plastic plate, and work it with a clean putty knife until it begins to thicken. Wipe the scratch with a cloth dipped in the solvent that comes with the filler, then press the paste into the scratch with the putty knife. Immediately wipe away excess filler with the cloth. If the filler shrinks as it hardens, wait an hour and then repeat the process.
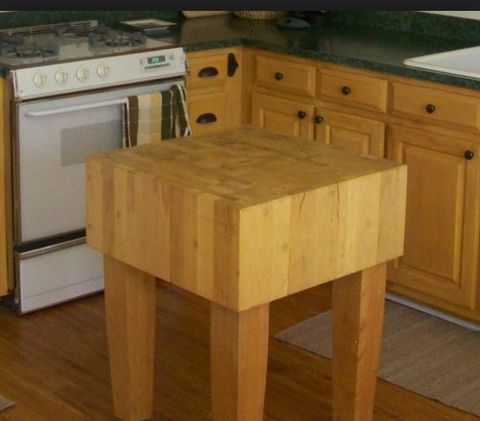
Restoring a blemished butcher block
Set the edge of a steel scraper against the butcher block at a 60 degree angle, beveled edge up, and pull it across the blemished area. If scraping fails, run an orbital electric sander with medium-grit sandpaper over an area slightly larger than the stain. Keep the sander moving to avoid grinding a depression into the surface. Smooth the surface with fine-grit sandpaper, and apply vegetable oil or a nontoxic finish.
Replacing A Cracked Ceramic Tile
First, Removing the tile: With a grout saw, scratch the grout from the joints on all four sides of the tile, then attempt to dislodge the the tile with a pry bar, protecting adjacent tiles with a piece of cardboard. If the tile resists prying, drill four holes near the center with a masonry bit, then chip out the tile with a cold chisel and hammer. Scrape any old adhesive or grout from the opening in the countertop with a putty knife or a cold chisel, making the surface as even as possible. Wipe away dust with a damp cloth.
Second, Applying the adhesive: Use the flat edge of a notched trowel to coat the back of the replacement tile with adhesive, then comb the adhesive with the notched edge, leaving visible ridges.
Third, Setting the tile: Place the tile in the opening and gently set it into place with a slight back-and-forth twisting motion. Remove any adhesive from the tile surface witha damp cloth. Lay an 18-inch length of 2-by-4 on the replacement tile. Tap the board with a hammer to bring the surface of the replacement tile even with the surface of the other tiles. Allow the adhesive to cure, the grout the surrounding joints with your fingertip.
A Glass Inset For A Scarred Countertop
First, Cutting the hole: Set the rim of the inset or the template provided by its manufacturer over the damaged area, and mark a cut line on the countertop. Loosely bolt a piece of scrap lumber to the countertop to support the cutout piece you are about to make. Just inside a corner of the marked area, drill a starter hole for a saber saw. Cut out the opening, rotating the board ahead of the saw as you go. Lift out the waste piece with the board, and test-fit the metal rim in the opening. If necessary, enlarge the opening slightly with a course file.
Second, Preparing the inset: Set the rim of the inset upside down and squeeze a thin bead of silicone caulk around the inside flange. Turn the glass piece upside down and press it into the rim of the inset. With a screwdriver, bend the metal tabs along the rim outward to hold the glass in place. Apply a heavier bead of caulk to the outside flange of the rim, then set the assemblyinto the countertop.
Third, Fastening the inset: Underneath the countertop, hook one of the lugs provided by the manufacturer over the edge of the metal rim, insert the lug bolt and thread it into an anchor pad, then screw the pad against the underside of the inset piece. Repeat this procedure on the lug and bolt diagonally opposite, then on the remaining bolts. On the countertop, use a putty knife to scrape off excess caulk around the edge of the rim.
An Inlay Of Ceramic Tiles
First, Measuring the area: Draw a rectangle on the countertop one-quarter inch larger in each dimension than the area to be tiled. In each corner of the rectangle - and touching its edges - drill a quarter inch hole to the depth of the router cut you plan. Measure between the router bit and the base plate edge. Double the measurement, and add the result to the dimensions of the rectangle. Make a jig for the router, using these figures as inside dimensions. Clamp the jig in place. After adjusting the router to cut half the planned depth, place the router base against the jig.
Second, Routing the inset area: Turn on the router, lower it into the countertop, and move it to the center. To ensure support for the router, cut a clockwise spiral to the edge of the jig, then rout along the perimeter. Set the bit to the full depth and retrace the spiral. Beginning in the center, finish routing the remaining countertop inside the jig. To remove small countertop remnants in corners around the drill holes, score the laminate with a laminate blade in a utility knife, then chisel away the underlying wood.
Third, Laying the tiles: Cut a piece of plywood to fit the routed area, and glue it in place. With a notched trowel, spread adhesive over the plywood. Then set the tiles in the inset, and let the adhesive cure according to the manufacturer's recommendations. Grout and seal the joints between the tiles. After the grout has cured, caulk the quarter inch space between the tiles and the countertop with silicone caulk.
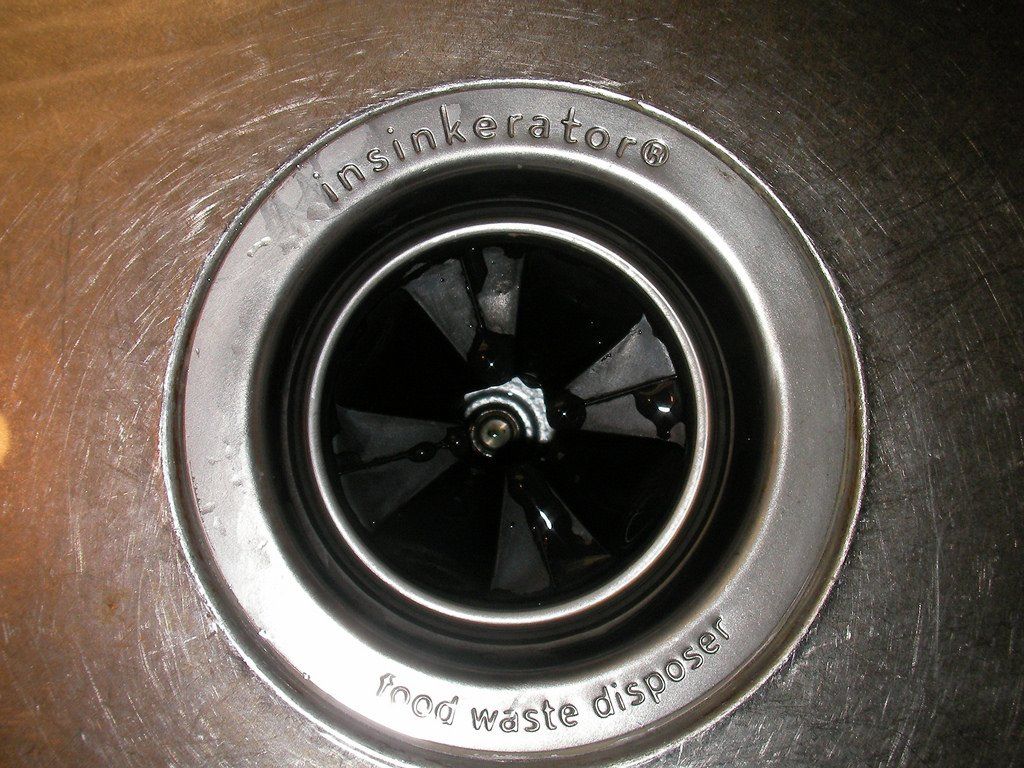
Dealing with a Stuck Garbage Disposer
Resetting the motor: First, ALWAYS turn off the power at the main panel or unplug the disposer before reaching into it. Second, If the motor doesn't hum at all, reach into the disposer and feel around for any objects that may be jamming it. Let the motor cool down for 15 minutes, then switch on the power at the main power panel or plug it in and gently push the reset button on the bottom of the unit until you hear it click.
Freeing the grind wheel: If the motor hums but the disposer does not grind, take a 1/4-inch hex wrench (or the wrench that came with the disposer) and insert one end into the hole on the bottom of the disposer. Turn the wrench back and forth to rotate the motor shaft until it moves freely.
Unjamming the disposer with a broom handle: If you are unable to clear the jam with a hex wrench, stick a broom handle into the disposer and wedge it against one of the impeller blades on the flywheel. Apply force until the wheel begins to turn freely, then work the wheel back and forth until it moves easily in both directions.
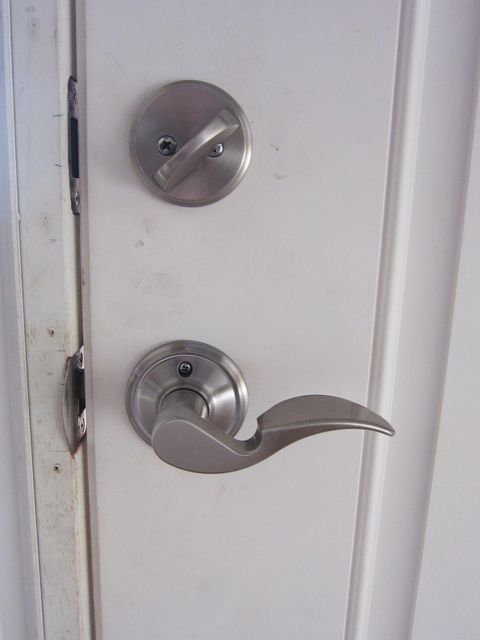
Replacing a seal around the door
First,Loosening the retaining screws: Starting at the top outer corner of the door, roll back the rubber gasket with one hand, exposing the metal retaining strip beneath. Use a nut driver to loosen the retaining screws two turns. Working across the top of the door and one-third of the way down each side of it, loosen each of the screws an equal amount.
Second,Installing a new gasket: Pull the old gasket straight up to free it from behind the retaining strip at the top of the door. Let the old gasket hang out of the way, and slide the new gasket behind the retaining strip, beginning along the top of the door and working down the sides. Partially tighten the screws. Working down each side, loosen the screws and strip off the old gasket; then insert the new gasket and partially tighten the screws. At the bottom of the door, slip out the old gasket at one corner, and replace it with the new gasket before loosening the retaining screws at the other corner. Then complete the last few inches of the installation.
Third,Squaring the door: Close the door and look for gaps between the gasket and the body of the refrigerator. Usually found on the handle side of the door, a gap indicates a slight twist in the door, introduced during gasket installation. If the door is twisted, open it and have a helper push on the top or bottom of the doorframe to counter the twist. If you don't have any help, support the door with your foot while pushing on the frame. Tighten the screws once the door looks straight. If a gap still shows when you close the door, open it again, loosen the screws a half-turn, and repeat the squaring process.

Contact St Paul Handyman at the number above or via the form below


Refrigerator Maintenance
Basic repairs for doors and drains
Dusting the cooling system: Condenser coils and metal cooling fins, which are best cleaned twice a year, are located either at the bottom front or on the back of the appliance. To dust bottom-mounted coils, remove the floor-level grille. Use a long-handled brush to dust the coils and fins, taking care not to bend them. Vacuum up debris.
To expose the coils and fins on the back of the refrigerator, roll or walk the appliance away from the wall. Brush dust from the coils and fins, or use a vacuum cleaner with an upholstery-brush attachment.
Adjusting a sagging freezer door: Using a nut driver or a socket wrench, loosen the two hex-headed bolts in the hinge at the top of the freezer door.
Reposition the door squarely over the opening of the freezer compartment by pulling upward on the door handle. Hold the door firmly in place and tighten the hinge bolts.
Check the new position by opening and closing the door several times. It should clear the refrigerator door and align with the top of the unit.
Unclogging the drain hole: Remove the storage bins at the bottom of the refrigerator compartment to expose the drain hole, if there is one. Pry out the stopper plug with a screwdriver.
Clear the drain by inserting a length of flexible 1/4-inch plastic tubing or a pipe cleaner into the hole and pushing it through the drain canal into the drain pan.
Flush the drain with a solution of soapy water and ammonia, forcing it through the canal with a baster.
Empty and wash the drain pan.